Subject:
|
Focke-Wulf FW190-D9
|
Scale:
|
1/24
|
Manufacturer:
|
Trumpeter
|
Price(October 2013):
|
US$100,00
|
Construction:
|
Out-of-the box construction, with some improvements made with the kit parts
|
Extras:
|
Seat belts harness made from etched parts
|
Paints:
|
See detailed construction
|
1) The sprues:
2) The construction:
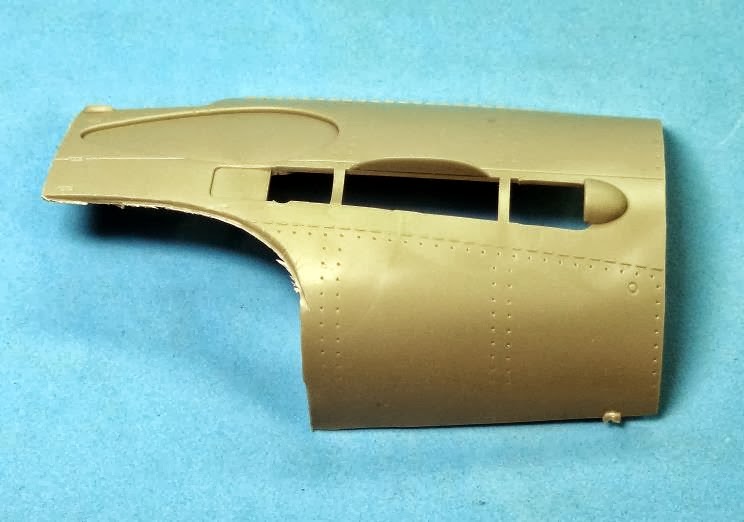
2.1) Engine bay: This is a very detailed area of the kit. However, Trumpeter molded the two fuselage pieces in a closed position and suggested you leave the upper part free to view the engine. Actually, the two side panels open upwards rotating along side this panel. Leaving the side panels and removing the upper one is not the way mechanics reached the engine. The fix for this problem is relatively easy. You can cut along the panel lines like the pictures bellow:
You can see from this picture that the cut is right were it should be:
You will and up with the side panels. If you choose, you can place them open at the kit but you will have to make another cut as you can see on the pictures bellow:
Here you see how the panels were opened too get to the engine:
You will end up with another problem. The upper panel is not molded to do this transformation. It does not have a straight line as you can see on the picture bellow, and more modification will be needed. As i wanted to show the guns and upper engine detail, i also removed this panel.
Bellow you see a picture of the upper panel with a curving edge:
2.2) Cockpit: painted RLM 66 and several details were picked-up with Vallejo acrylics after some dry brush with grey enamel.


2.3) Other details:The wheel wells were painted RLM02 with some extra detail painted with Vallejo colors:
Also the tail wheel got some attention, even if not too much will be seen once the fuselage is closed:
The main landing gear is a nice piece o plastic modeling. It has a spring inside so the oleo struts actually work. Careful painting make it shine!
Once placed in it´s position, the landing gear is strong and holds the plane with no problem.
Painting requires a lot of masking. Late war Luftwaffe planes often showed many different shades of paint due to dispersed production and lack of quality control on the colors.
Trough out the painting process, weathering was done in order to get a nice finish and also simplify kit´s construction.
The weathering effect on the flying controls was done by masking and spraying a light coat of X19 Tamiya smoke.
The underwings metallic finish was done with a mix of XF19 grey and X11 chrome silver. The darker shades of aluminium were obtained by a light coat of X19 smoke.
One of the most important part of this project was the engine. I used as reference a few pictures the i took at the Deutches Museum in Munich of a Jumo 213. They show several tones o metallic colors as well as some black parts. This might be the result of production differences between manufacturers and/or due to the assembling of the museum´s engine being the result of the use of several different parts from various Jumo 213 engines
To get some weathering on the metallic parts of the engine, i painted it with a technique a enjoy.
First i gave the engine block a flat metallic base coat from tamiya acrylics using X11 and XF19 grey mixed 50:50.
Then i highlighted some parts of the engine with Tamiya XF-1 flat black.
Then i used the dry brush technique with Testors metallizer to give a nice metallic shine.
Here is the final result of the engine assembly with the radiator and propeller.
Some of the markings were painted on the kit to get a better result in such a large scale model.