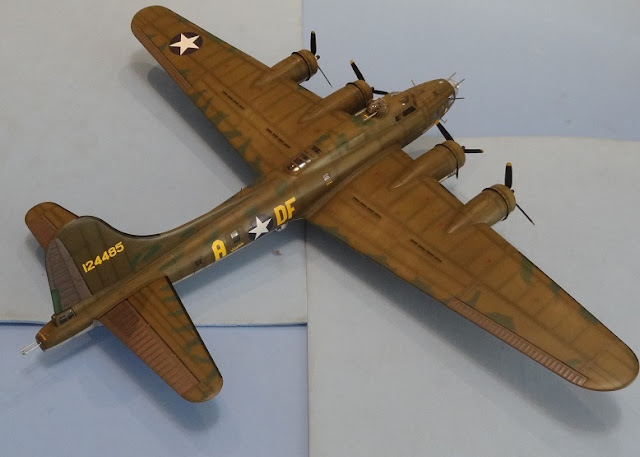
Trough out the many years i have been modelling, the hobby has shown a lot of progress in the area of molding technology and working equipment. Back in 1982, when i started building plastic kits, there was no internet with the thousands of sites devoted to the art of kit construction, there were also no magazines, airbrush was an expensive tool not available to young modelers and aftermarket industry was at best in its infancy. However, it was a great period to become a modeler here in Brazil. Revell kits were being manufacturer here, at a low cost and several new kits were hitting the shelves at our local hobby shops every other week. Aircraft history magazines were becoming available witch made modeling much more interesting. In the next ten years, several new brands were imported and we started to get used to build Tamiya, Hasegawa, Hobbycraft, Italeri and Airfix kits.
Several of this new brands soon started to release kits with new molding standards. Perhaps, one of the most important was the introduction of recessed panel lines. An issue that started many intense debates, the recessed panel lines soon became an important condition for modelers to decide what kit they were going to build. New releases of kits that had previously been available with raised panels indicate the importance of this subject to the industry and the costumers.
However, some important subjects remained neglected by the manufacturers trough out all these years. I remember back in 1982 when Revell from Brazil released the 1/48 scale Boeing B-17F. I was excited and got it as soon as it arrived at one of our local hobby shops. It was my first 1/48 scale kit. It was big and, by that time, was a great model. I build it and was pleased with the results. As time passe by, my B-17 became old and quite not up to my modelling standards. I salvaged some parts and the rest became history. Since then, no manufacturer has shown interest in releasing a modern kit of the B-17 in 1/48 scale.
About a month ago, while visiting the last hobby shop still in business in my hometown, i saw the re-box of the now old Revell B-17F in 1/48 scale. It is the same kit i built back in 1982. Detail is minimal with raised panel lines. However, i decided to re-visit the subject with a new perspective. I was not going to re-scribe all the panel lines, but i new from the beginning that the key to a good end result was a nice paint job. So i decided to use the technique described bellow. I don't know if anyone has published this before, but it works quite nice and is much simpler than trying to scribe all the panel lines on a 1/48 scale B-17!
First i painted the camouflage. I use a post shading technique, highlighting the central area of the panels with a lighter tone of the basic color
My initial weathering tool is a 0,7 mm pencil available everywhere
Using the raised panel lines for orientation, i draw the structural panels of the kit. I don't worry about precision as this is a weathering technique.
The detail is not overdone as you can imagine looking to close to the kit part. Bellow you have a comparison between the two wings, the left one being the highlighted of course.
I added some increased weathered effect by airbrushing Tamiya smoke along the panel lines. The control surfaces were also weathered by the technique usually used on WW1 aircraft.
The weathering complete just waiting for the mat coat.
Here you have 3 pictures of the completed effect of the technique on the lower fuselage and wings
Now, on the next two pictures, the final effect after highlighting with Tamiya smoke.
The technique works with darker tones too.


