
Subject:
|
Messerschmitt Bf109 G-10
|
Scale:
|
1/24
|
Manufacturer:
|
Trumpeter
|
Price(December2013):
|
US$100,00
|
Construction:
|
Mostly out-of-the box construction.
Seat belts made of Tamiya masking tape and photo-etched small parts. Some instrument dials made with Aeroscale dials decals set. |
Extras:
|
Seat belts harness made from etched parts.
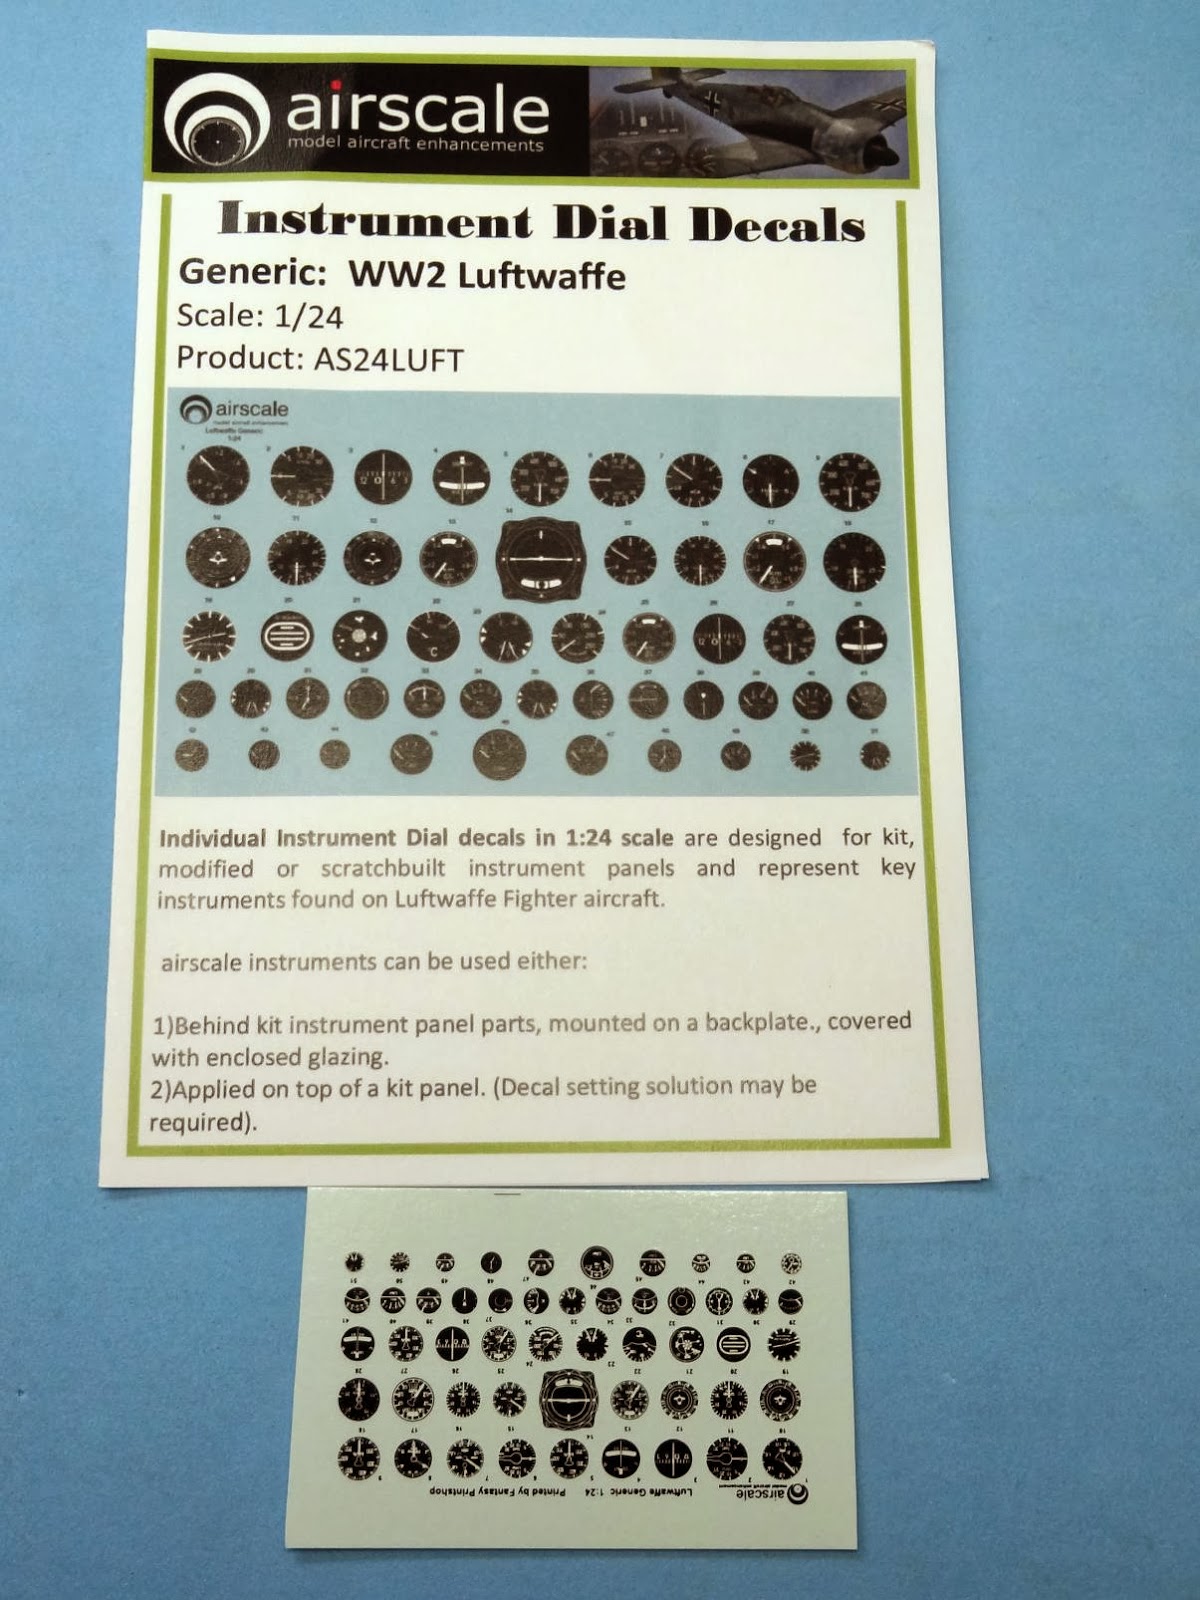
Aeroscale instrument dials decals generic for Luftwaffe aircraft in WW2 (AS24LUFT). |
Paints:
|
See detailed construction
|
1) The sprues and painting guide:


1) Cockpit: After gluing the floor with the rear panel of the cockpit, i started some painting to give it just a little bit of wear. The base color was Tamiya XF53 neutral grey. Some areas were highlighted with Tamiya XF19 Sky grey. Then everything was blended with Tamiya XF24 dark grey.


Small details were the highlighted with an edge painting with 0,3mm pencil and vallejo acrilics aplied with brush.


The instrument panel was painted as the cockpit parts. Dials were made with the film provided by Trumpeter and they look nice. Some instrument faces received a color painting much like i´ve seen in some pictures of Bf109 fighters.

However, some smaill parts miss the sma e detail. I then used the nice set of Aeroscale instrument decals in 1/24 scale with generic WW2 luftwaffe instruments.



2) The engine: I painted the engine block XF-1 flat black. Then i drybrushed Testors aluminium metalizer. To give back the black tone but still leaving some metallic finish, i used XF-1 flat black with 90% of thinner and airbrushed the the engine block. A light coat of Future sealed and gave the engine a nice final look.


3) Fuselage: Some dry-fit showed that fit is nice of the two sides of the fuselage. The cockpit and engine go together as one piece:


4) As i was building the fuselage, i also took some time to paint and weather some other parts of the aircraft that would be added at the end of the construction. I used my traditional technique with a sharp pencil and also some MIG products like this mud wash.

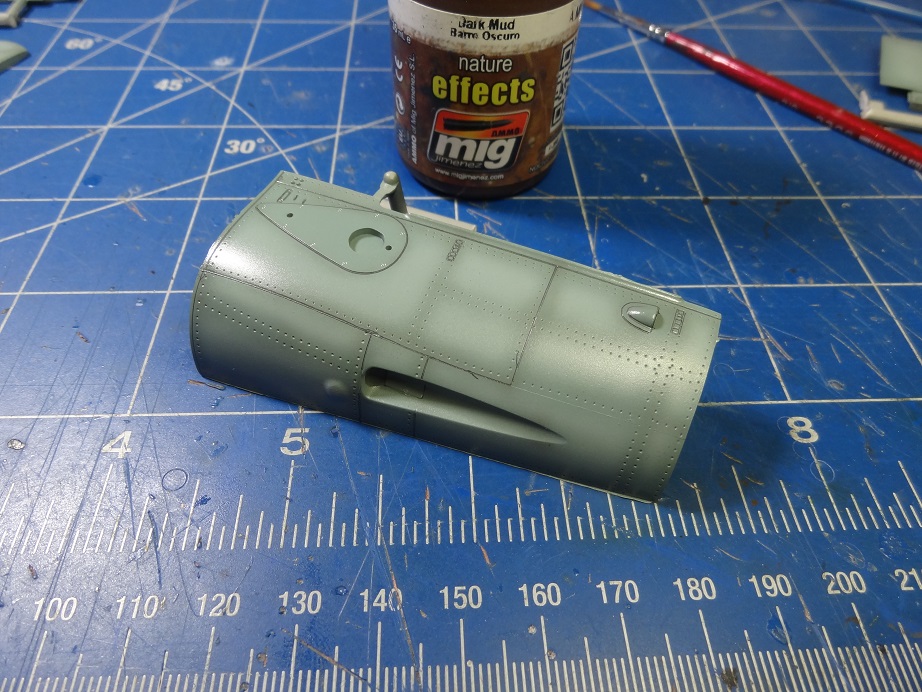
The difference between the weathered part to the left to the unfinished one on the right is evident.


5) Gluing the two fuselage halves was easy and fit was very good. However, the wing to fuselage joint was poor, with a huge gap. To solve the problem, plasticard cut to the shape of the wing was used to fill the area as putty would be too fragile.


At the lower wing surface, the posterior wig to fuselage joint showed some fit problems too, but was easily fixed, this time with putty.

7) Once i was ready with the construction of the main parts of the kit, the cockpit, engine, wheel wells, radiators and tail wheel where masked for painting the camouflage.


8) This is the version i decide to build . It is Lt Alfred Seidl's Messerschmitt BF109G10-R6 werk number unknown, from 2.JG3 based at Paderborn in 1944. Two interesting features: no underwing luftwaffe markings and the canopy was painted in a dark color, different from the camouflage.


9) I used tamiya acrylics all over the kit. The Luftwaffe markings were also painted, and the raer fuselage band also was airbrushed for a more realistic finish. The center of the panels was highlighted with a clear tone variation of the base coat done by adding tamiya XF-2 flat white.


10) Weathering was done by highlighting the panel lines with a sharp pencil. Then the rivets were weathered with MIG dark wash.When everything was ready, i airbrushed a highly diluted mixture of Tamiya smoke and Tamiya XF64 brown over the panel lines and some rivets. Everything was selaed with Future before placing the decals.


11) Final assembling was done along the with the decal application. The kit was so large and there were so many details the i was afraid i was going to damage the small parts while handling the model. This is not usual for me.


Now the kit is almost done. Next time, i will post the pictures of the completed model.


